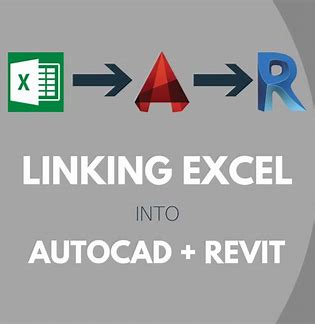
Linking Excel tables into AutoCAD and then into Revit

1. Open Excel Spreadsheet
First, open the excel spreadsheet that needs to be linked into your project file. It’s best to format the Excel file now, but you can always come back at a later time and reformat.

2. Open an AutoCAD file
Open a new AutoCAD file if you will be linking the spreadsheet into Revit, but if you’re linking into an existing AutoCAD project, open that project file.
3. Click the Link Data icon
You can find this under the Annotate tab in the Tables section.

4. Click Create a new Excel Data Link

5. Enter Data Link Name
Enter the name of the data you'll be linking in and hit OK. Then hit OK on the Data Link Manager dialogue box.
6. Browse for an Excel file
Select your Excel file. You can choose Link Entire sheet, named range, or link to a range.
7. Check “Link to range:”
Flip back over to your Excel file to check the cell range for the information you're linking. In this case, the cell range is A1 to E30. Select OK

8. Your data link has been created and is read to be inserted.
9. Click on the Table icon
You can find the table icon under the Annotate tab in the Tables section.

10. Select Insert From Data Link
Then use the drop down menu, as shown below, to select the data link you just created and hit OK.

11. Place table
Click anywhere in the drawing space to place your table.
12. Save the file
Linking Excel into Revit
Excel can't link directly into Revit so a workaround for that is to link the Excel file into AutoCAD (as we just did above) and then link the AutoCAD file into Revit.
1. Open your Revit project
Navigate to the sheet you want to put the spreadsheet onto.
2. Select Link CAD icon
You can find the Link CAD icon on the ribbon on the Insert tab on the Link panel.

3. Modify Link settings
- Navigate to where your AutoCAD file is saved, make sure it's a DWG file, and select the file.
- Change the colors to Black and White
- Change positioning to Manual - Center
- Click Open on the dialogue box

4. Click anywhere on the drawing area to place the schedule.
5. Save your file
That's it you're done!
Making Changes to the Table
Any changes that need to be made to the table/spreadsheet, whether it's formatting, content, etc. should be done within the Excel file. Something to keep in mind though is that, although the table is linked into both AutoCAD and Revit, it won't automatically update when you make changes.
Here's what you need to do to make sure those changes are reflected in AutoCAD and Revit as well as Excel.
1. Save your Excel file
2. Update AutoCAD
Now go back to your AutoCAD file, select the entire table, and click the Download From Source icon. You can find it under the Annotate tab in the Tables section. This will pull the new information from the Excel file and update it in the CAD file.
3. Save the file
4. Manage Links in Revit
Go back to Revit and select the Manage Links icon on the ribbon under the Manage tab in the Manage Project section.
5. Reload Link
- Select the CAD Formats tab
- Click on the link you want to update
- Select Reload and hit OK
6. Save your file
Check to make sure that the updates are reflected in your Revit project and save the file.
Note: If you close and reopen your Revit project after updating the AutoCAD file, the changes will automatically update in Revit once you reopen the file. This will not happen automatically in AutoCAD though. You will still have to reopen the AutoCAD file, download from source, and save the file to update any changes made in the linked Excel file.
Additional Tips
Modifying Number of Cells
If you make any changes to the number of rows or columns in the table, simply go back to the Data Link Manager and adjust the cell range. Then save and reload the link in Revit.
Copying Schedules in Revit
If you copy a linked schedule in Revit across multiple sheets, only the original schedule will be linked. So if you want to have the same schedule on multiple pages, be sure to link them in on each page, not copy them.
